We are pleased to inform you that you can now use Xpiks to upload videos to mediaCastpro.
Xpiks is a microstock keywording and uploading tool. With Xpiks you can build your own unique workflows for adding metadata and submitting your artworks to microstocks. Xpiks automates majority of the routine tasks and allows you to accomplish your goal faster. For more information you can see the website https://xpiksapp.com/.
To use Xpiks to upload videos to mediaCastpro, simply follow the instructions below:
- Find out the username for mediaCastpro FTP server
- Add video files to Xpiks
- Edit metadata
- Save changes
- Upload files to mediaCastpro
- Export metadata to CSV file
- Edit CSV file (optional)
- Upload CSV file to mediaCastpro
- Confirm completion of upload
1. Find out the username for mediaCastpro FTP server
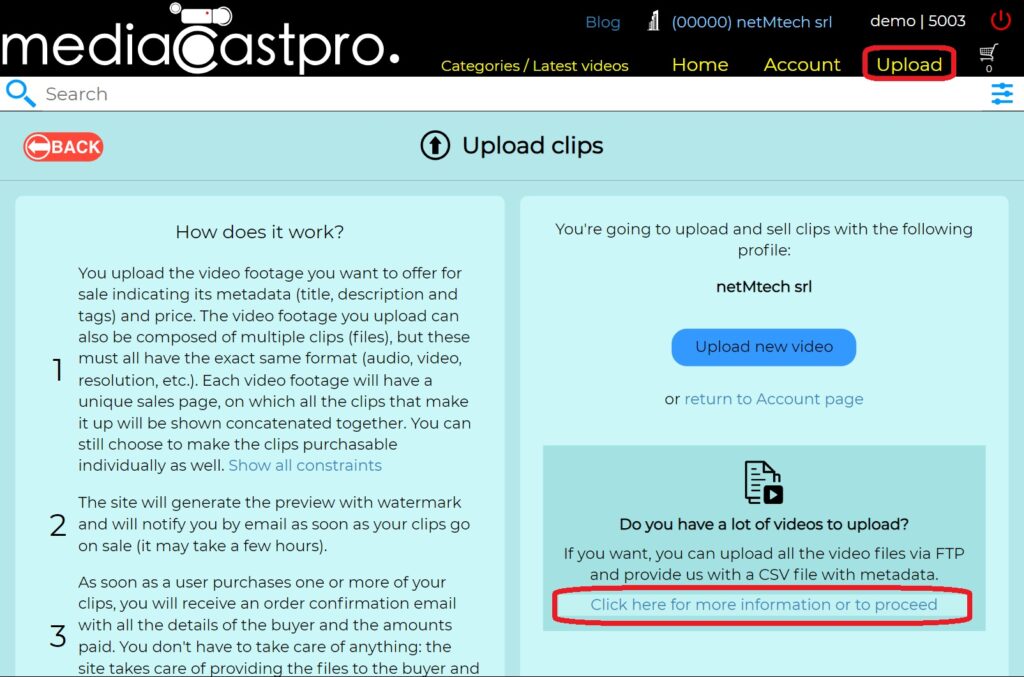
First of all, find out the username for FTP access. In fact, the username to use for FTP access is not the one you use to login to mediaCastpro. You can find the correct FTP username by logging into mediaCastpro, going to the “Upload” page and clicking on “Click here for more information or to proceed”.
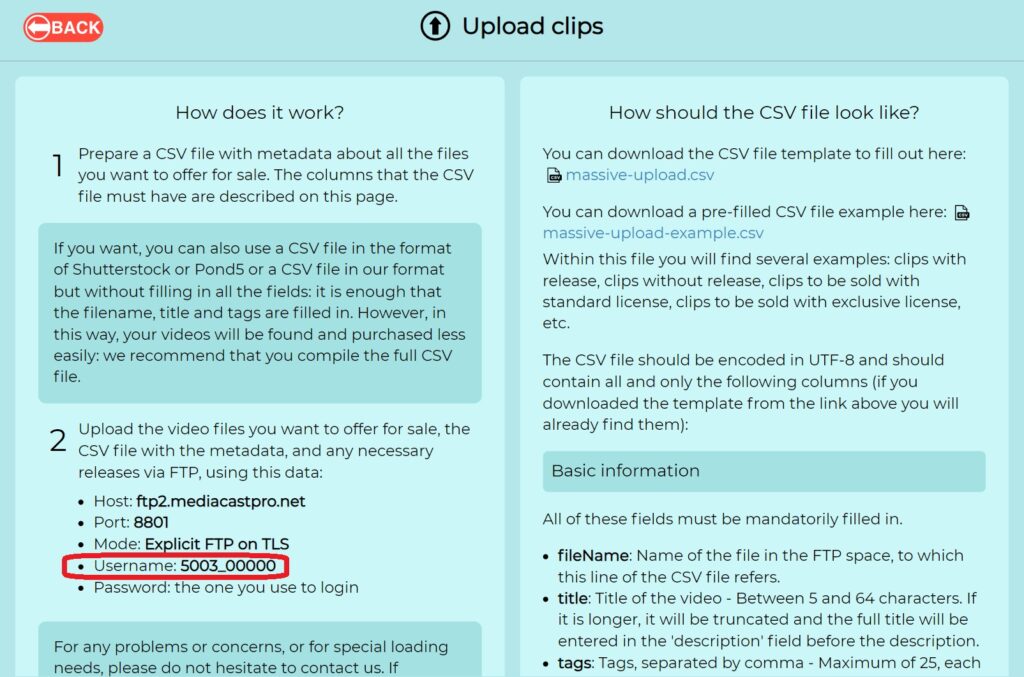
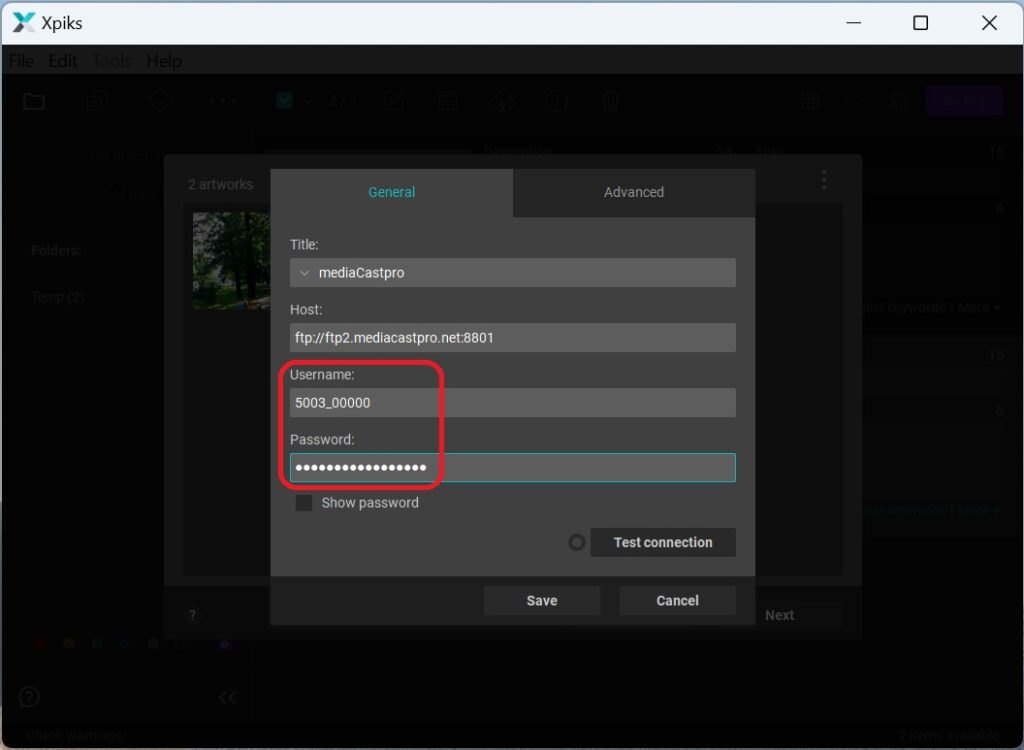
In this page you can see your FTP username, that is composed by 4 digits, an underscore and then other 5 alphanumeric characters. Write down or memorize the username because you will need it later. Instead, the password to use for FTP access is the same you use to login to mediaCastpro.
2. Add video files to Xpiks
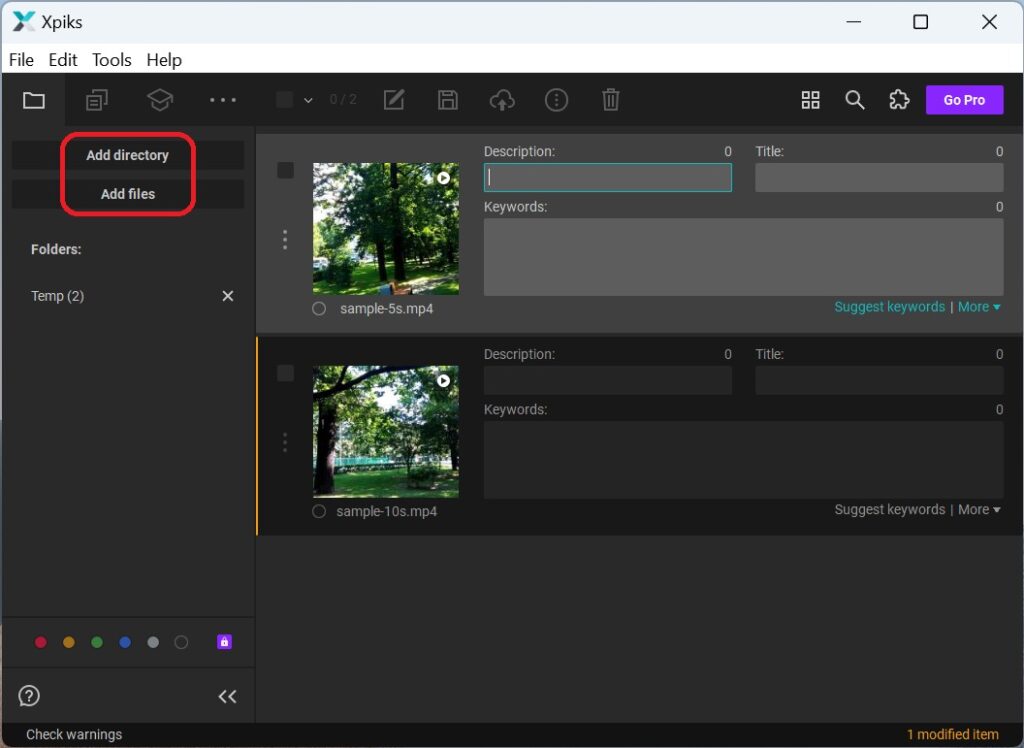
Open Xpiks app and add files using the “Add directory” or “Add files” buttons.
3. Edit metadata
Fill in the metadata for each file.
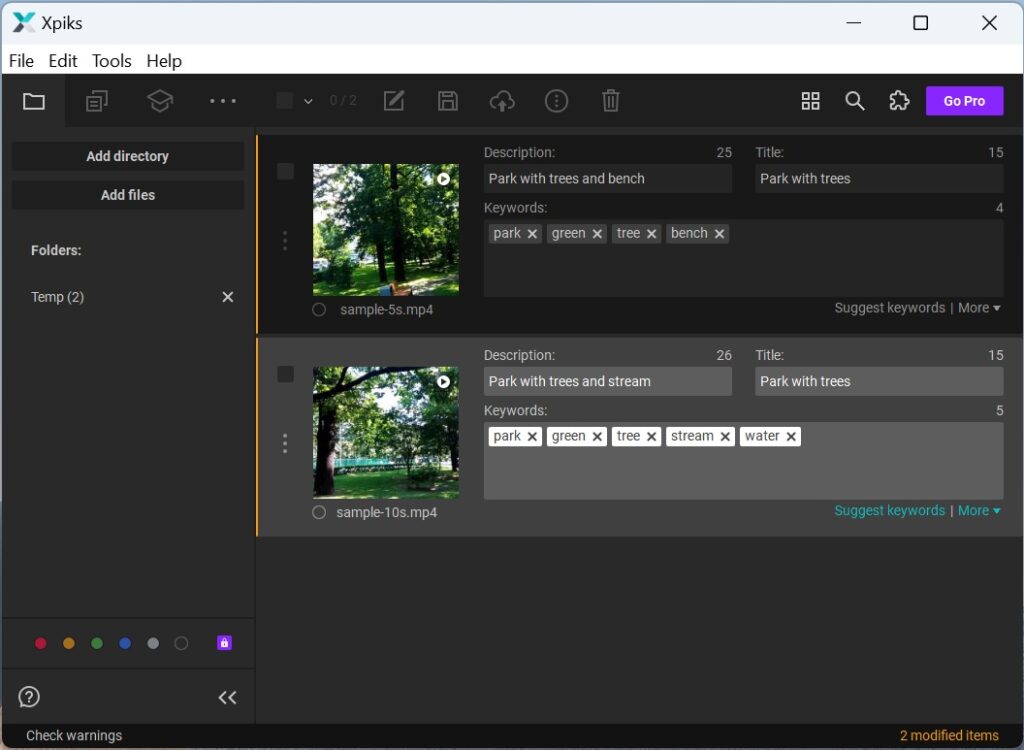
Xpiks offers several ways to set metadata. You can find more information here: https://xpiksapp.com/tutorials/intro-editing/
4. Save changes
Select all the files and save them.
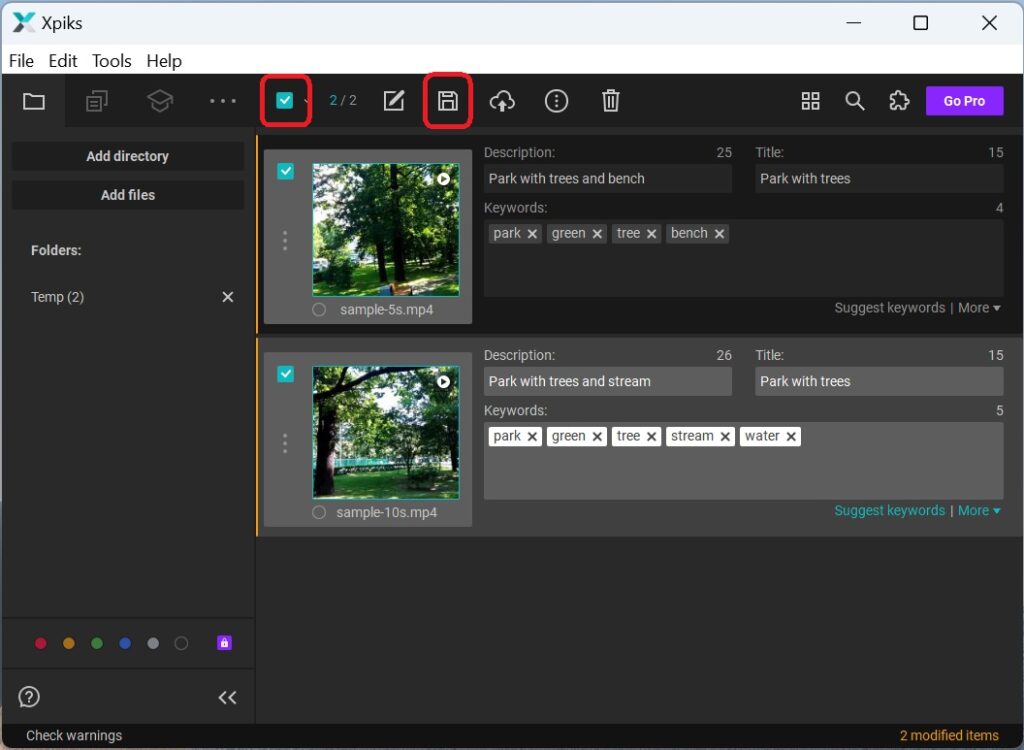
5. Upload files to mediaCastpro
Click on the “Upload” button.

If this is the first time you are using Xpiks to upload to mediaCastpro, click on the three dots icon and select “Add new”.
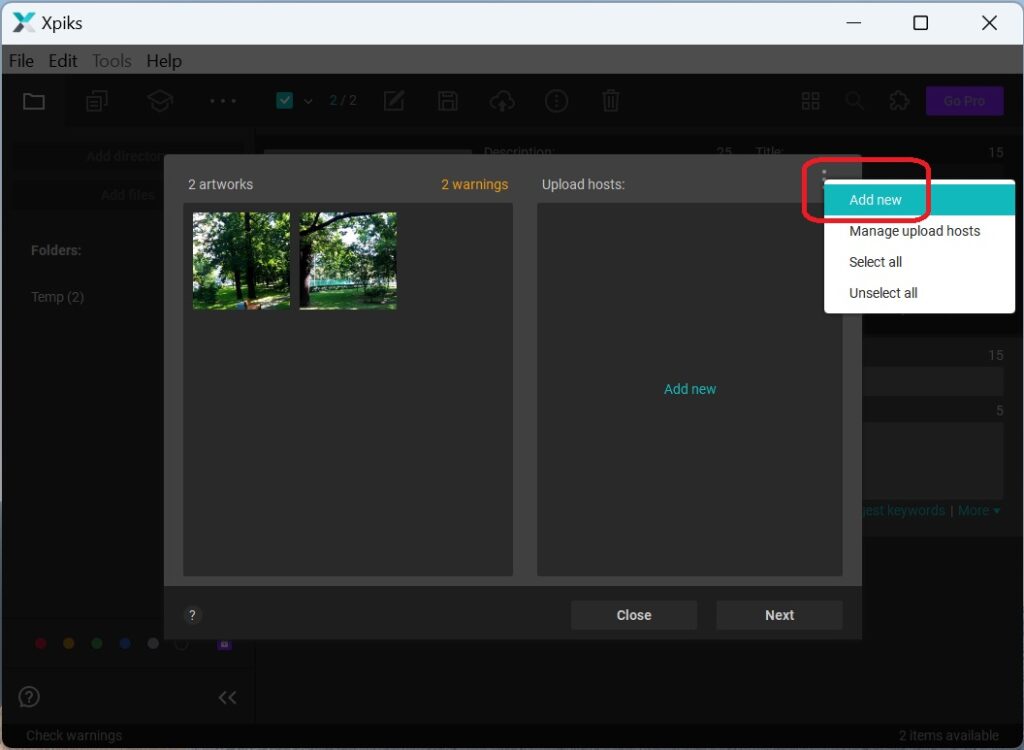
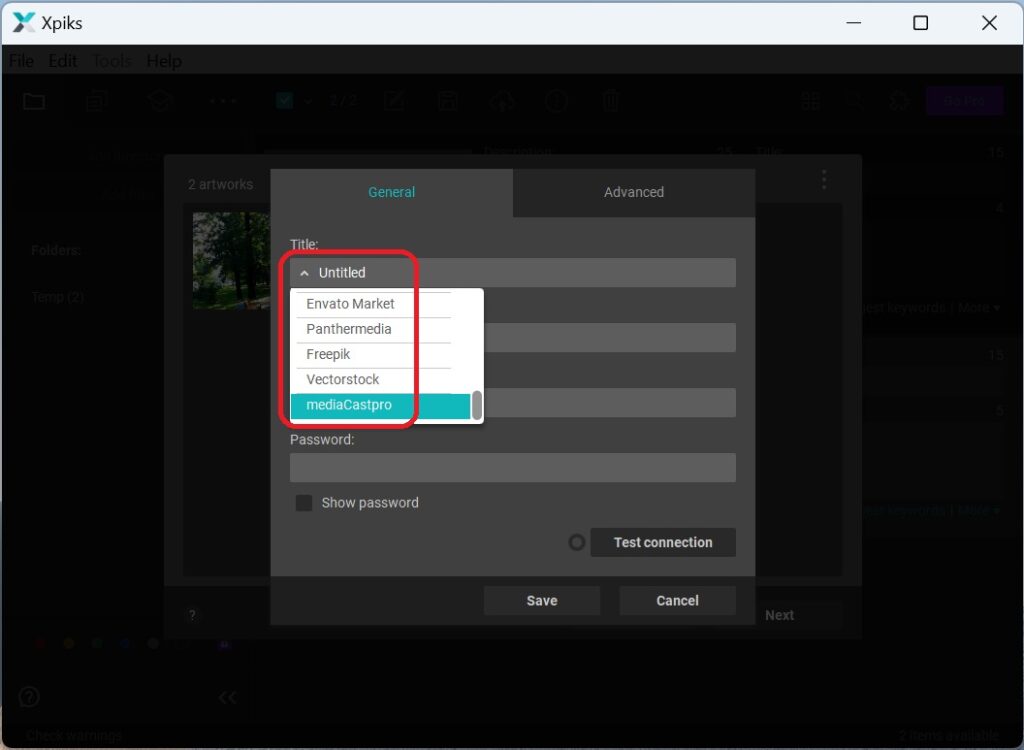
Select “mediaCastpro” from the list.
Fill in username and password for the mediaCastpro FTP server with the data you found on step 1.
Select “mediaCastpro” and complete the upload process.
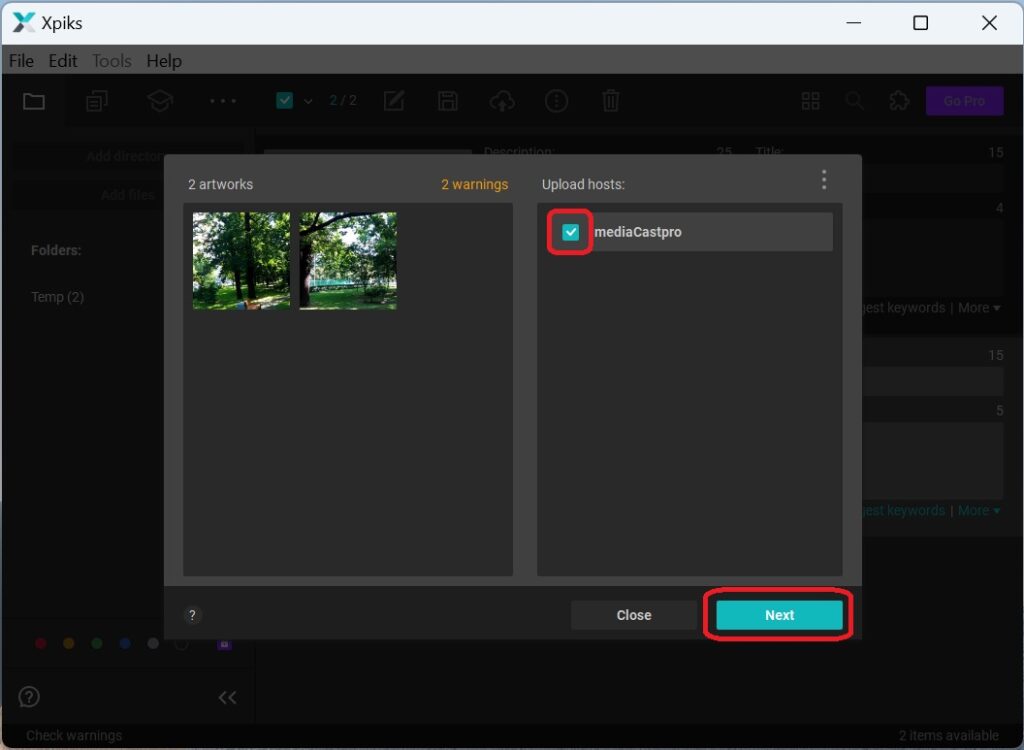
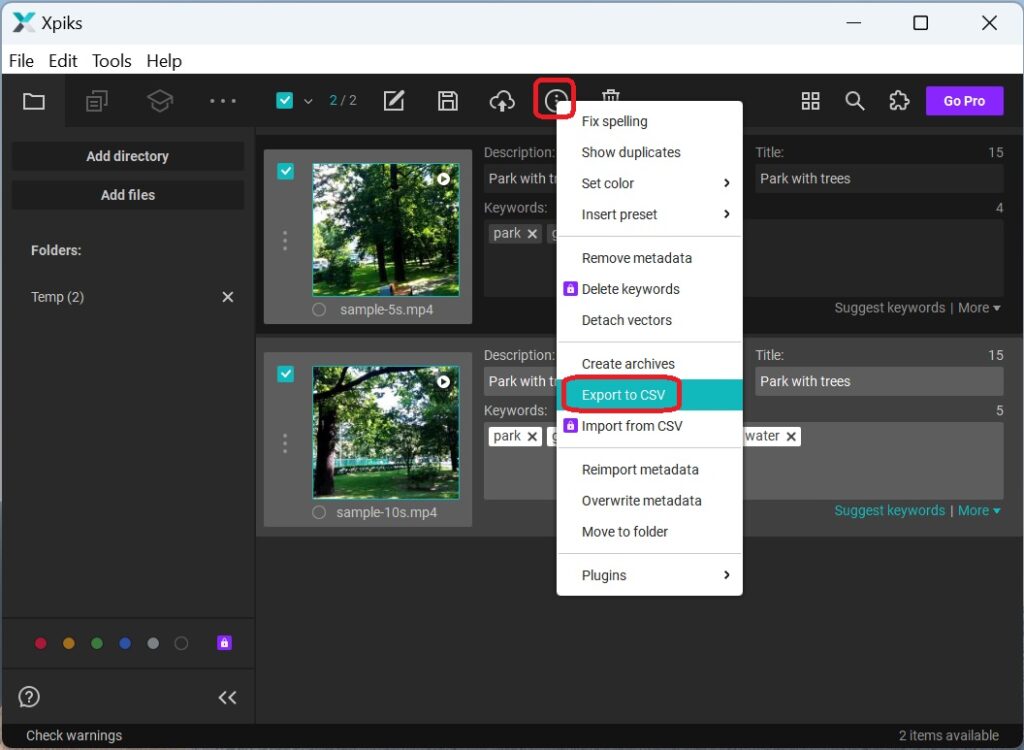
6. Export metadata to CSV file
Select the “Export to CSV” command.
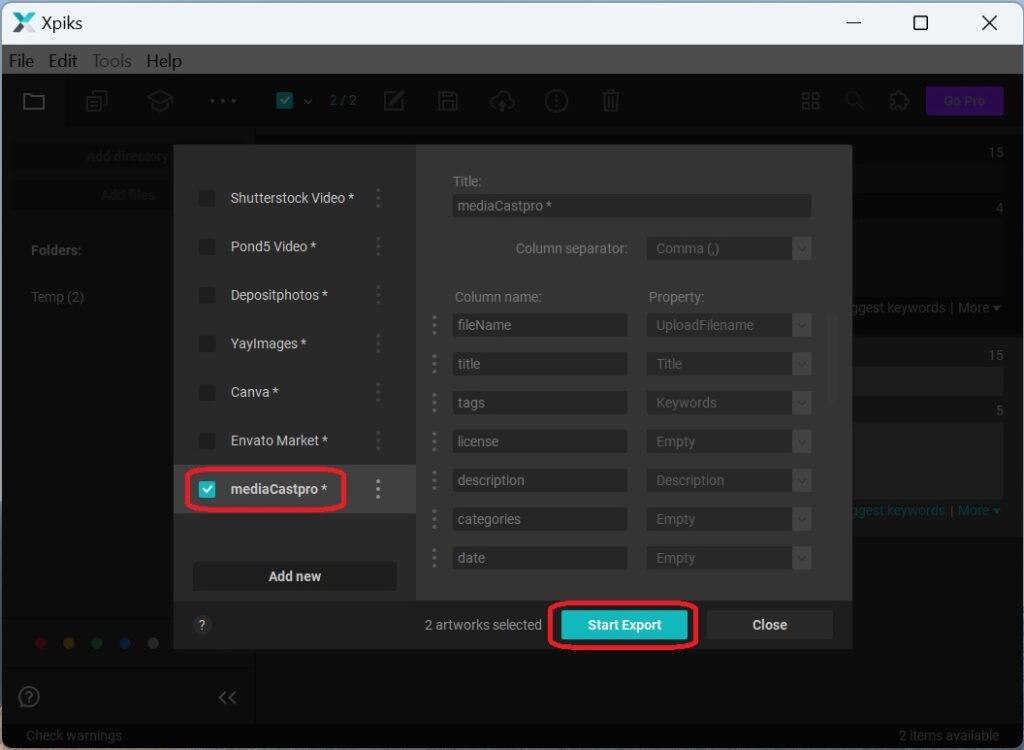
Choose “mediaCastpro” and save the CSV file.
7. Edit CSV file (optional)
The CSV file generated by Xpiks will contain only file names, titles, descriptions and keywords. However, for better indexing of videos on mediaCastpro, it would also be useful to fill in various other data, such as the location of the videos, the date, the selling price, the camera model used, and many others. If you want, you can open the CSV file with an editor of your choice (even Excel is fine) and fill in the empty columns. For more details on the meaning of the columns, you can login to mediaCastpro, go to the “Upload” page and click on “Click here for more information or to proceed”.

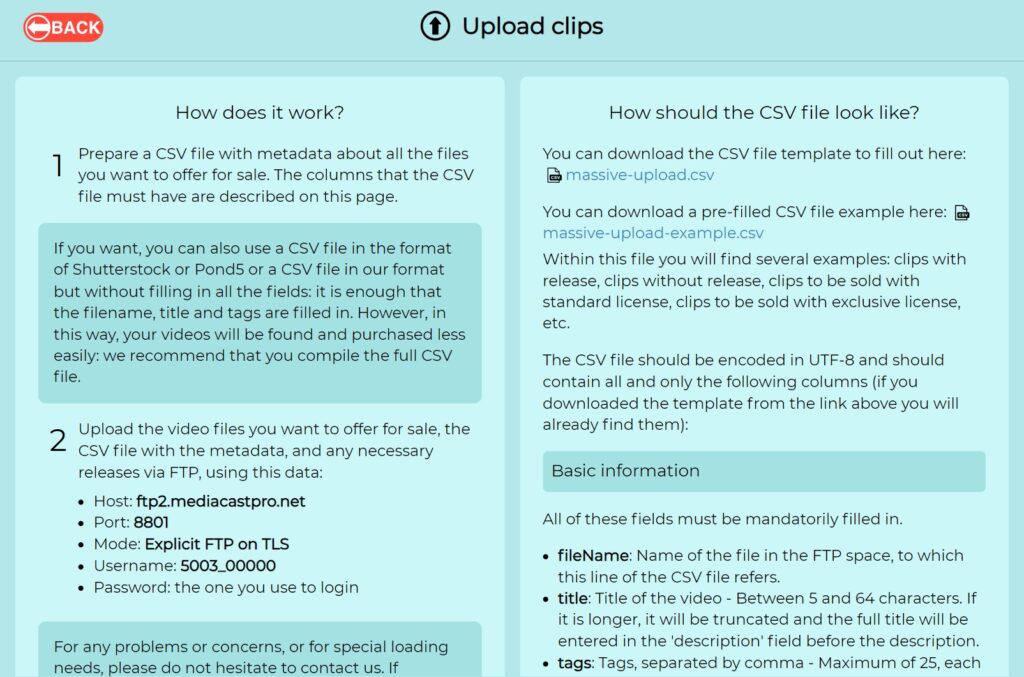
If some mandatory data, such as the selling price, are missing in the CSV file, you will be prompted to enter this data directly into mediaCastpro at step 9.
8. Upload CSV file to mediaCastpro
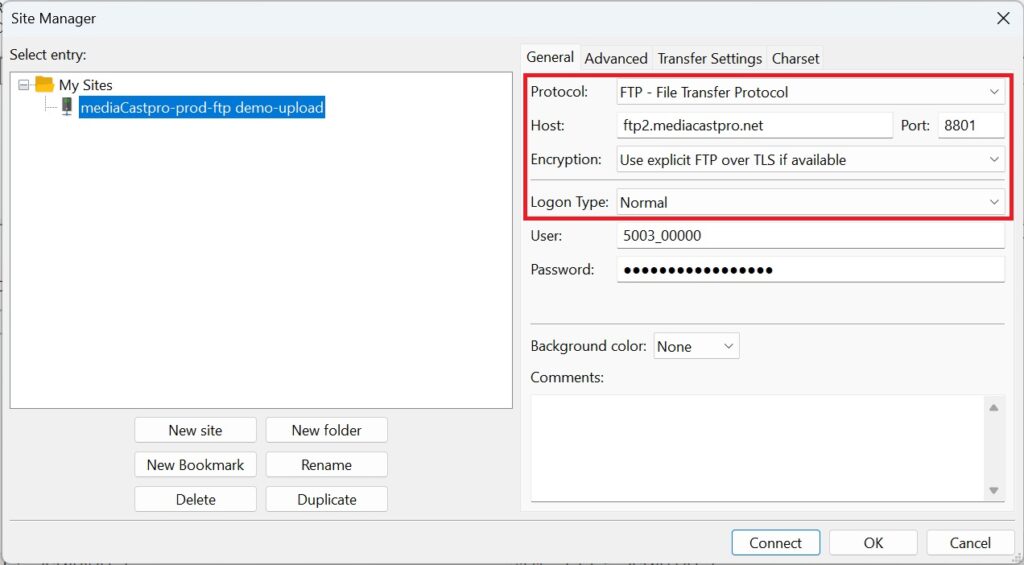
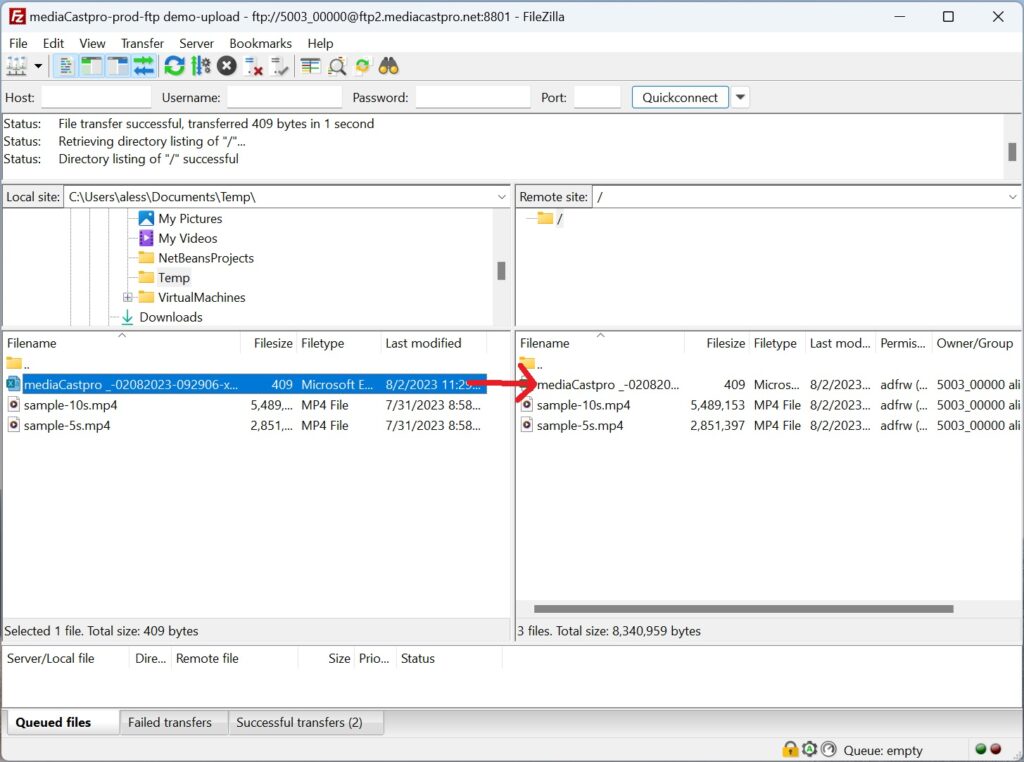
Use your favorite FTP client to upload the CSV file to mediaCastpro. The username and password to use are the ones you found on step 1. You can use FileZilla that can be configured in this way:
9. Confirm completion of upload
Login to mediaCastpro, go to the “Upload” page and click on “Click here for more information or to proceed”.

Accept conditions and confirm completion of upload.
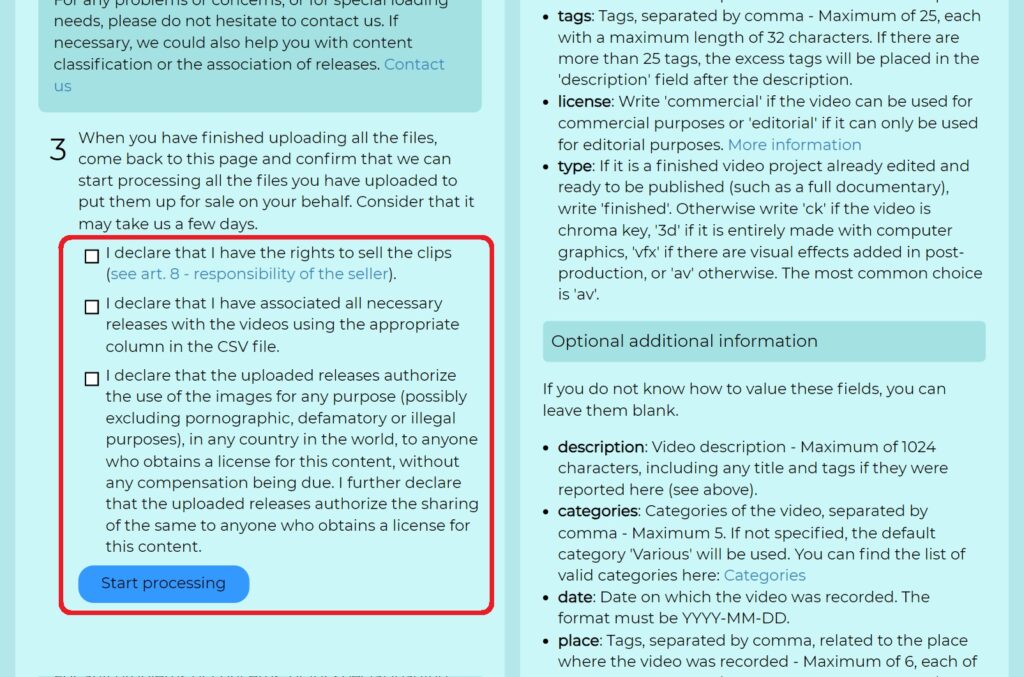
If the CSV file does not contain some mandatory data, such as the selling price, you will be asked to enter a unique one for all of the clips before you can proceed.

